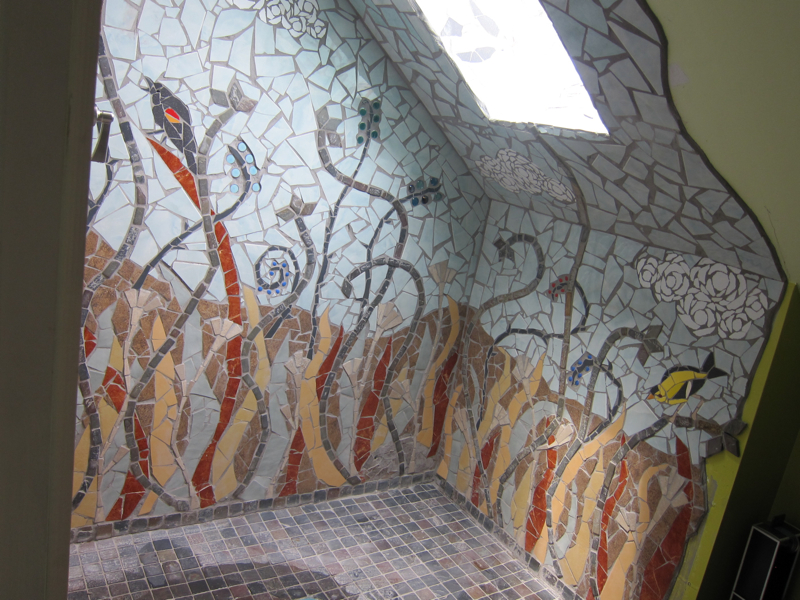
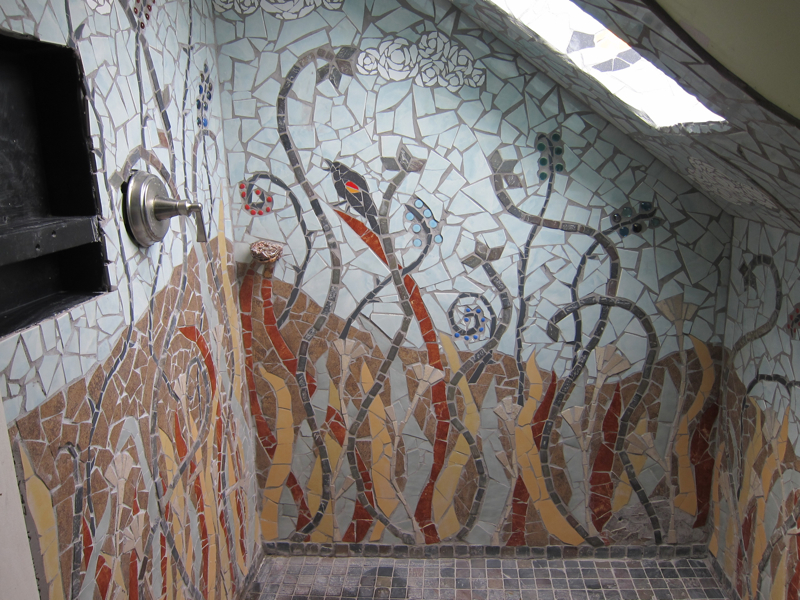
My shower surround is finally finished!
Okay well, the niche isn’t but that involves a promise and procrastination.
I finally bit the bullet and decided to JUST. DO. IT.
And I’m so glad I did!! Showering in it is as delightful as I’d hoped.
In taking photos of it, I have decided to make this a post about the whole bathroom. This is possibly the first themed room I’ve ever done. It is SO fun! Anyhow, the shower is about half of the space.
I was concerned about making the grout stick to the celiling.  Obviously it is not straight up but at a pretty steep angle and I felt that if I got the grout the right consistency and also if I positioned myself correctly, I would be able to do it and indeed that was the case. I made the grout a little thicker but not so thick that it was not sticky which can happen. The hardest part was actually getting it up in the pointy peak part where the ceiling the wall meet because it is a small pointy space.
The big mistake I made and the thing I learned was that my placement of tape was STUPID. I put it in places where I could not extract it and did not need to protect that surface. Namely on the skylight, the floor and the side of the trim.  see that hint of blue along the edge? TAPE.
Anyhow, here is the end result
and let me just say that showering in here, night or day is SUBLIME. Yes, a little bit of water bounces off your body or the shower floor and gets onto the bathroom floor but a nice absorbent rug takes care of that- way better than some suffocating and ugly off-gassing shower curtain.
The only plumbing glitch we encountered was that the brand new shower head was not working. Apparently it had gunk in it from the new plumbing- we took off the head and pulled out the putty-like stuff and then it worked wonderfully!
Here are some detail shots:
yes, the grout on the slate looks a bit sloppy- let me just say in my defense that slate is tricky with hidden cracks and a certain “attraction” for grout.
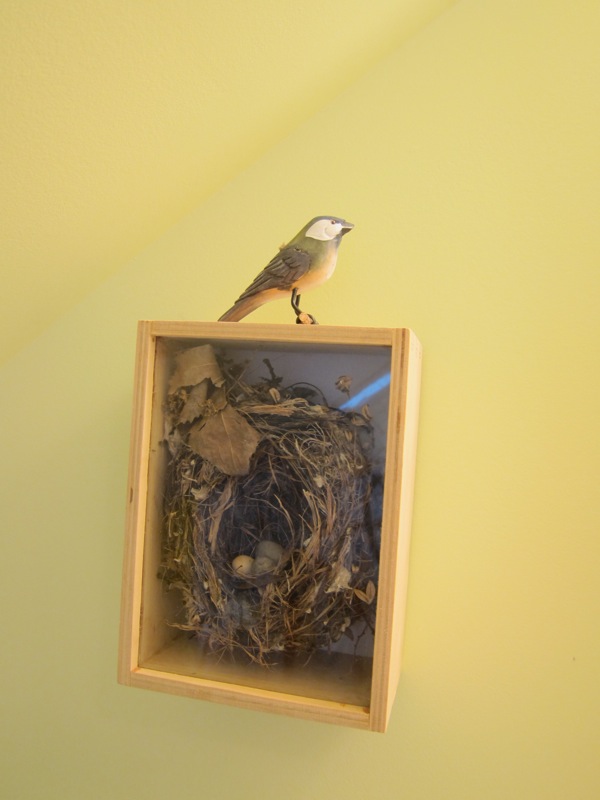
a redwinged blackbird and its nest, this one I made and it has holes in the bottom to drain any water.
a rabbit hiding in the prairie grasses;
I’m afraid the grey grout helped this rabbit hide a little more than I would have liked.
all the little details of the shower.  The shower has a prairie theme
  and the overall theme of the bathroom is birds and nests.
Another note on paint color. I picked it before the lights were installed. Once they were in the green (on the bottom) was overpowering in such a small space so I picked a much lighter green and had the upper half painted with that. I love the two tone- I think it worked out well. Props to Ray, my painter!
I made this toothbrush holder/vase- I think it’s what inspired the whole theme!
Now, does anyone know where I can get some egg-shaped soap? I had to carve these myself! 


Glynnis — The shower surround is absolutely amazing!! Congrats on getting it done.
Glynnis!!!!!!!! magnificent!!!!!!!!! I loev the room, wow…I am speechless…:)
MOE 🙂
Amazing! And very inspirational….
Hi from Reno, NV–
I saw your lovely shower mosaic mentioned on Emily Murphy’s website. What a triumph in wonderful bathroom decor you’ve produced! I forwarded the link to my stepdaughter who is gradually covering the entire outside back wall of her house in mosaic. Here’s the comment from Kathleen in Oakland, CA:
Really nice! Love it. One of her comments about the slate “attracting†grout makes me want to tell her about my solution for that for future reference:
If you use grout/tile sealer on the unfinished tile, slate, terra cotta, etc. BEFORE grouting, it is much easier to remove the grout when you’re doing the clean-up!
Now that I’ve taken a break from trimming to enjoy seeing your shower mosaic and sharing with Kathleen, I’m off to trim some more pots…
Joan Miller
Blue Lotus Pottery in Reno
Joan, thanks so much for sharing that tip from Kathleen! It makes total sense and I will file it away for when I work with soft, porous tiles as I believe that is why they are harder to clean.
Beautiful design. If you want to make the rabbit stand out you can go over the grout lines with white (or black) grout….any darker color will work…just a little will cover it.
Just Fantastic! I love it! We have a walk in shower too, I hope someday to knock out all the boring white tile and do something fun! Hopefully I get to see it (and you too 🙂 next time I am in town.
Thanks Jenny! Me too!
Beautiful shower! I want to do a mosaic surround as well, a little simpler though :). I want to use bits of broken ceramics but I’m unsure whether it will work or not. What did you use? Any advice would be appreciated, thanks.
Thanks Lindsey! I used mostly new tile bought at a tile discount store. I would not recommend using pieces of broken pots because they are curved. Laying out and glueing on curved, lumpy arched pieces is considerably more difficult! your mastic or cement must be much thicker to hold them and then grouting and cleaning up is miserable. Really, only plates are much usable for this sort of thing.
Good luck to you! I’d love to see the finished result!