
This is just a quick tutorial on how to make a “Faux Bois” (fake wood) texture on a slab.
It is my impression that Faux Bois is all the rage and if Martha Stewart has Faux Bois wrapping paper, clearly, to be able to make a dish or box using it, it’s a GOOD THING™
It is also a good thing to do all the steps and do them in the right order.
Start with a slab that is about 1 inch thick.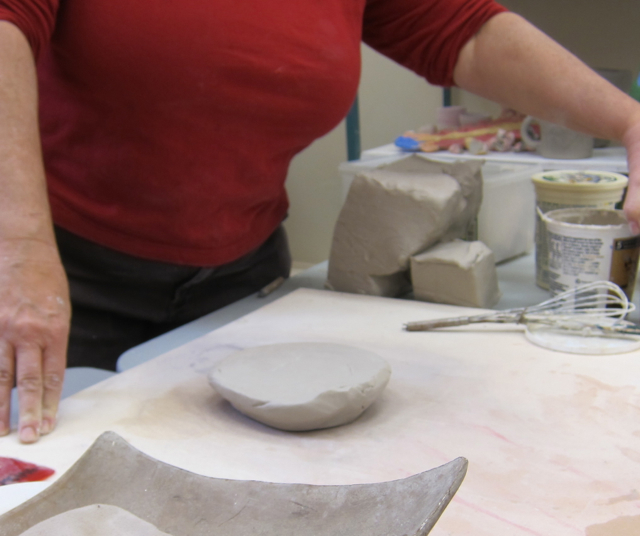
Paint some slip on there or even underglaze in a fairly thick coat. I’m using chartreuse to make it particularly hard to see in my photos.
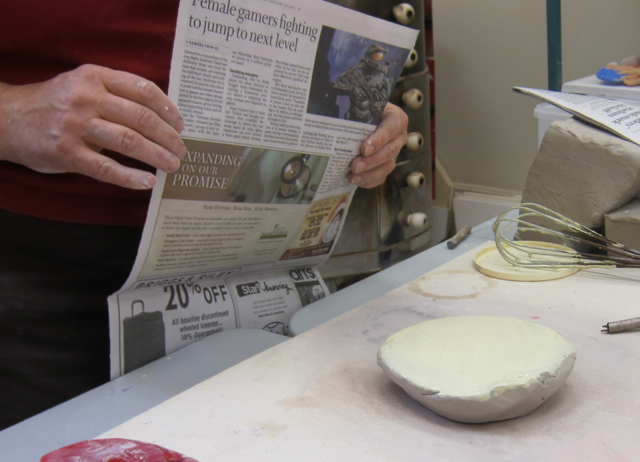
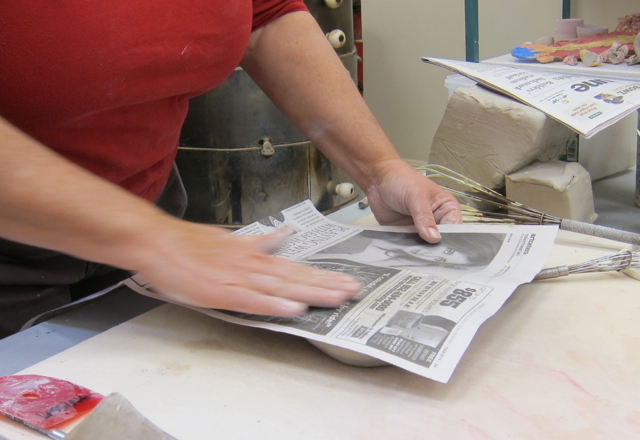
Take sheets of newspaper to “dry” the slip. Just lay the newspaper on there and watch as the moisture begins to show through the paper. When you pull up the first sheet, you may end up pulling off some of the slip-
just set that piece aside and keep drying with successive pieces of newspaper until there is no moisture being absorbed by the paper.
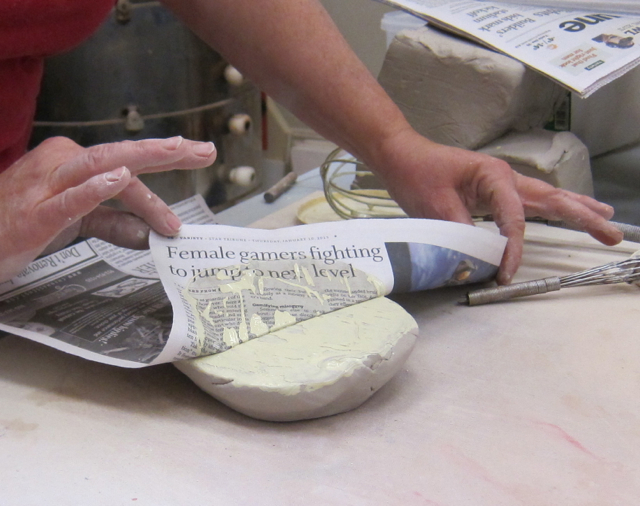
Here, I’m rubbing the paper down to aid in the moisture absorption.
At this point, if you wish, you can try to re-apply the peeled up slip. If you can get it to stick down to your now dryish surface, you may have to dry off the new bits with one more sheet of newspaper.
You are wondering why we need to “dry” the slip? We are going to stretch the slab under it. If the slip is wet, it will just stretch nicely with the slab and we won’t get any of the cool effects we’re trying for.
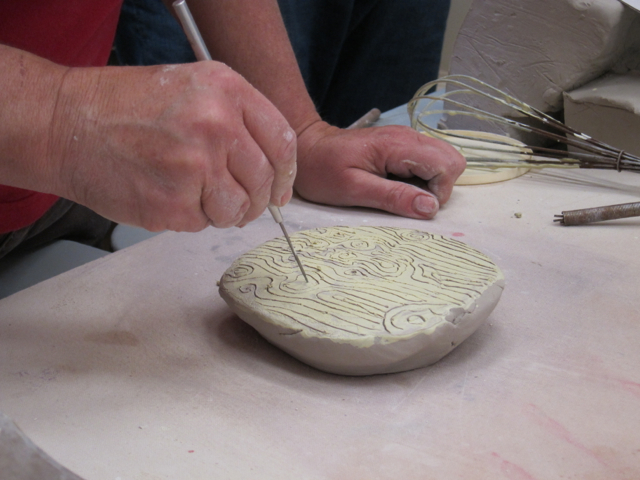
When your surface is not tacky or shiny, take a sharp tool like a needle tool and draw in the wood pattern. Basically you draw a few knotholes and then draw vertical lines that bend around them when they encounter the curve of the knothole. Take a look at some wood grains or Faux Bois wrapping paper for reference.
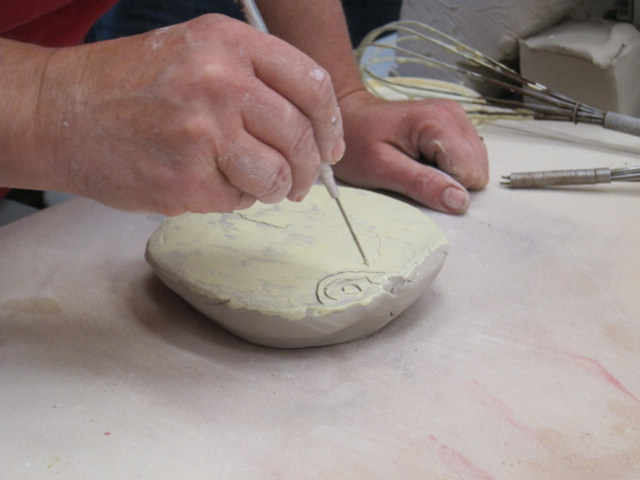
Don’t go too deep! You only want to pierce that dried slip layer. Also, draw it smaller and closer together because this pattern is going to
e x p a n d .
Next, begin to throw out a slab. This is a little tricky as you shouldn’t hold the slab on top and you can’t flip it over, you have to throw it with the slip side facing up the whole time.- my action shot of this did not turn out.
As it stretches, the faux bois pattern will become spread out and more proportionate.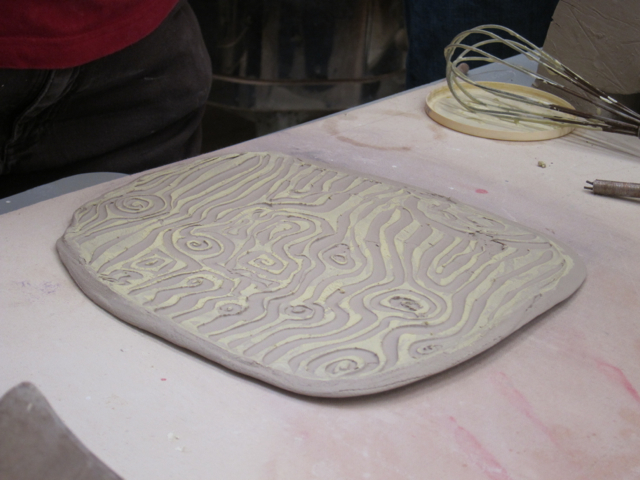
I’ve found that if it has really sharp edges, once it is all the way thrown out, you can go over it gently with a rolling pin but I would avoid that if you can.
Then you can let it harden to leather hard and build something with it like a box, or you can drop it into a mold and make a dish.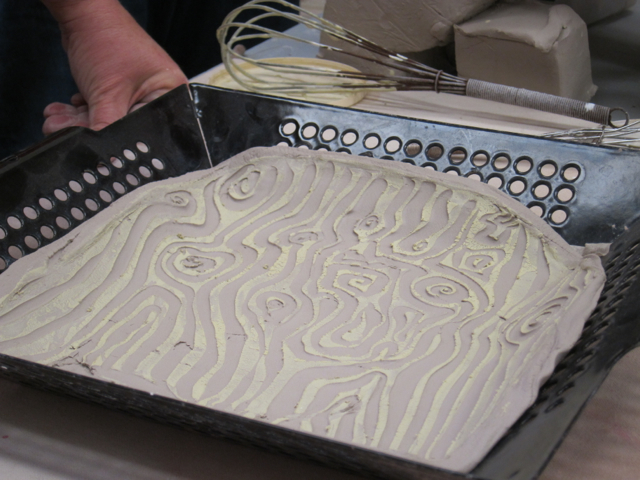
Obviously you are going to need a transparent type glaze on it like clear or a celadone or even a shino depending on how dark your slip or underglaze is.
Have fun!
This looks so easy and fun!!! Thanks for this great idea…
Warm Hug
Love this, can’t wait to try it with brown slip and shino!
Great tutorial. Looks like fun!
thanks I’ve done faux bois with black slip before but didn’t stretch out the slab, nice technique, green like a mesquite tree or a reddish brown like the bark of a crepe myrtle would be nice too.
Thanks you guys! Linda, those sound like good suggestions! I have done it in lots of colors and
I think High contrast colors are probably the most effective.
Thank you for this useful and attractive blog. I probably won’t make faux bois texture, but I sure am going to try this trick of stretching the slab after scoring slip in other patterns. Stretching would never have occurred to me!
I’m glad you liked the post Celia! Yes, you can make all sorts of textures or patterns on that layer of slip before you stretch it. I’ve used tracing wheels which make a dotted line, clay stamps, rolled in a netted bag to make a woven pattern, multiple layers of different colors… anything you can imagine!
The trick is the “drying” step so that the slip doesn’t just stretch with the slab. By the way, I learned this technique from the potter Eric Jensen. He uses it in beautiful ways with his hand-built work.