Wedging: it’s not about air bubbles!

Wedging. Who writes about wedging?

Isn’t it to get the air bubbles out? (NO!) And wedging is one of those zen practices that supposedly take 3 years to learn to do right?

Or, is it, in my experience, to get an internal coil going in your clay so that when you are throwing and you start to center on the wheel, your clay doesn’t fight you and centers up easily?

Why we wedge is something many potters know or have known throughout time but is still something I think should be discussed again; especially for art educators out there.

For years and years  and still! I have wedged Japanese style; spiral wedging (pointy end under my left hand, right hand on the fat- butt-end) with the spiral  at the fat end of my clay- running counterclockwise. That is, if you looked down on the fat end and imagined the spiral turning, it would spin into the center going counterclockwise.

Yes, I painted on the clay to try to show the spiral direction- which is counter clockwise when the fat end is pointing up- but when you put it on the wheel- it’s going clockwise!

Then I  plopped that fat end of the clay down on my wheel-head and proceeded to throw American style with the wheel running counterclockwise (and the internal spiral going against that- clockwise) and I would very frequently have to battle my clay a bit to get it centered.

So often,– and especially after I got really consistent and more skilled at throwing– I noticed my clay would just refuse to totally center. It would get this little blip- a wobble, a part that seemed like it simply refused to settle down and let me get the clay all-the-way centered and I knew I was doing everything else right. Even if I coned it up and then brought it down just right, there would be that little blip again that I would end up trying to work around. Or, after I got the walls pulled, I would wonder why my pot would suddenly get some sort of odd wobble in it for no apparent reason.

Why did my un-wedged smaller lumps of clay behave so much better? For a while I gave up wedging anything that came straight out of the bag but for large pieces, it was pretty tiring getting it centered.

Finally, overhearing another teacher at Lill Street mention offhandedly something about the spiral helping to center the clay and, at some other point, after beating my clay into submission yet again and feeling like I was not going to always be this strong, a careful examination of the direction of my coil came the realization that the way I wedge was Japanese (the wheels in Japan go clockwise) but my throwing is western ((American wheels spin counter clockwise)

And it takes a fair amount of visualizing to figure out which way the internal coil in the clay is going once you’ve popped it onto the wheel. The fact of the matter is, it was pointless to wedge my de-aired, pugged clay if I was going to put the internal coil going against the spin of my wheel!

note!!!!

I don’t know how many countless people, students, educators, etc, have asked me, “don’t we need to wedge the clay to get the air bubbles out?” The answer is an emphatic NO!

Air bubbles in and of themselves are not a problem! It’s only the moisture* they hold that cause explosions. If something is properly dried, you will rarely have explosions.

So please don’t waste your time or your students’ creative-time wedging clay that has been already de-aired in a pugger- i.e. any commercially made clay- clay you would buy in a box.


This clay has been de-aired in a  pugmill. There are usually no air bubbles in it!

In fact, improper wedging will more often add bubbles and you willl just dry out your clay in the process.

Simply make sure the pieces get enough drying time and have no plaster mixed in with the clay- that IS a sure recipe for explosions.

So why DO we wedge?

When it is for throwing**, it is for getting an internal coil in the clay so it is easier to center the clay. I do not wedge anything under 2-3 lbs if it comes straight out of the bag,I save that effort of wedging in an internal coil for larger pieces of clay when I would be wrestling to get a piece centered.

Here is how I currently work: any clay straight out of the bag under 2.5 lbs does not get wedged.

It is airless and too small to matter. 2.5 -3 lbs get wedged the new way trying to train my poor hands to reverse their roles and anything over 3.5 lbs is wedged the old way and then flipped over.

Did I find it easier once I flipped my wedged clay upside-down onto the narrow point but with the internal coil now “tightening” when my wheel head went around?……Immensely.

All those old problems disappeared and it was much easier to center. Just recently I forgot to flip a wedged piece, began to center it, felt the blip and realized what I had done and so I actually cut it off the wheel and turned it over and then it was just fine. What a great illustration of what I had been learning.

And yes, I mentally slapped my forehead for not figuring this all out years earlier!

Oh well, better late than never and since I did not figure it out for so long, I thought I would share what, in retrospect, seems like an obvious fact with all you out there who may have also missed it.

*Why is moisture a problem? Once the clay hits the temperature of water boiling, any water will, in fact, boil and turn into rapidly expanding gas which has no space to expand. The result? An explosion as the gas pushes the clay out of its way.

**There are just a few uses for wedging when you hand-build. Chiefly it would be to even out clay that had been stored a long time- say one side is a bit drier than the other. When I hand-build I use it to make sure my slabs shrink back evenly in all directions- but just take a look at my blog entry on throwing a slab vs. slab rollers for an explanation of that.

***

And while I am on the topic of de-aired clay, I had a batch of reclaim that I took to a friend’s house and used their Soldner mixer to get it back in shape. I ended up with 300lbs of porcelain filled with micro-bubbles. I slam-wedged it quite a bit but I could never get out all the millions of tiny bubbles so I tried throwing with it. It was very interesting! I could throw a lot taller with it, The clay was stiffer and a bit shorter.  “Shorter” in clay terms means that it is less plastic, it won’t stretch as much. Clay is always a balance between wonderful elasticity and not having floppy collapsing clay. In porcelain, I feel that line is even more delicate.

It was great to make a lot of tall and large things out of grolleg porcelain and I simply avoided pulling handles from it or bringing down wide rims or even making a pitcher spout with that particular clay. I used my regular clay to make handles and they fit the mugs I threw just fine. My other concern was a lumpy surface and I did 2 things; I ignored it and the bubbles seemed to flatten out in the firings and I also took a serrated rib and ran it over the whole surface while I was throwing and then smoothed it again. Neither method was perfect but I used up (and sold the end products) of all 300 lbs.

When I discussed this batch of clay with my friends who had lent the mixer, he had also mixed a batch of porcelain with similar results, a stiffer clay. He quoted a old potter who said pugging ruined clay.

This is one of those posts where I would very much welcome comments from potters who will know more about this than I do.

So what are your thoughts and opinions on wedging?

Hand-built plates by Kip O’Krongly

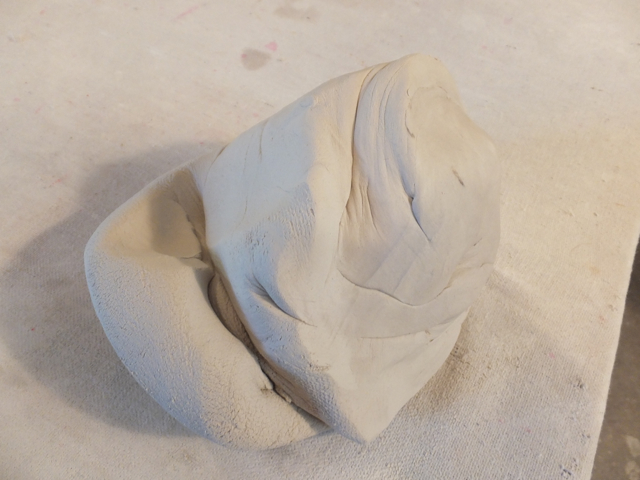
Just a few of the women potters of Northfield were able to gather at Kip O’Krongly’s studio this past week to watch her demonstrate how she makes her wonderful handbuilt terra cotta plates.1 kip's finished plates

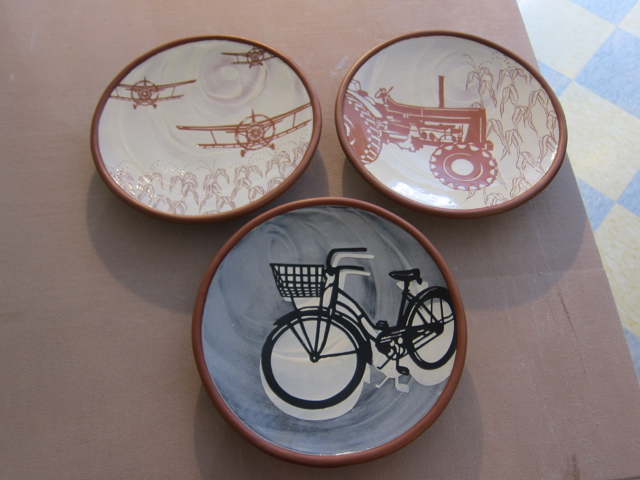
My first caveat in this tutorial is that Kip works with Terra Cotta and additionally, it is a custom recipe of hers. That said, I do believe most any Terra Cotta will work and possibly stoneware. What I’m really not sure about is if you could do this with porcelain! Those higher fired clays tend to get a little slumpy at cone 10. I plan to try this in the spring and will post results (eventually!)


What you will need:

A file folder or other heavyish card stock for templates

Cutting tool like this
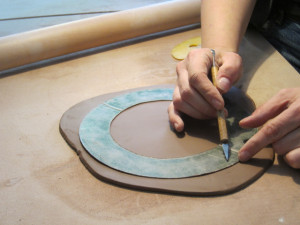
8favorite tool or a needle tool

Rolling pin and 2 ¼ “ thick sticks or a rolling pin like Kip has with rubber washers that set the depth or maybe a slab roller

And an extruder that looks like a calking gun. I’m sure you could try the whole thing out with just a coil  but if you were going into production, you’d probably like to have the extruder.

Banding wheel(s)

Scoring tool

Water

Yellow rib

A beveling tool with a rubber tip

Here we go:

Kip took about a pound of clay and began to roll it out with her special rolling pin- I think she said she got this from a kitchen supply store- it comes with various sized removable rings- what a great clay tool, right? (*If you Google “Fondant rolling pin” you can find them for sale in many places)2 rolling pin


She had a tip for rolling it out- just roll up to near the edge – not over the edge and then work that lump outwards until it rolls under and becomes the edge.6 shows spot where you stop -trick to rolling

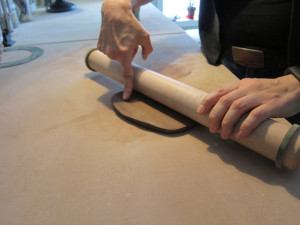
Lay your plate template down- she made hers from a  file folder and laminated them. Her template for dessert plate fit right inside her dinner plate template!9 templates for dinner and dessert
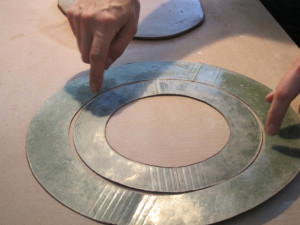
They will eventually wear out.

Cut around the outside edge, lightly trace the inside circle.10 cuts around template11 does NOT cut through inside ring


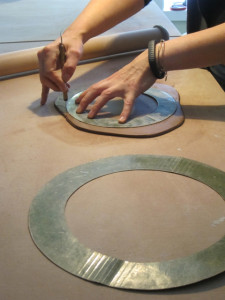
Because Kip makes about 10- or 20 of these at a time there are points at which she makes a bunch and lets them sit. This would be one of those points- she would cut out quite a few of these and let them sit until she was ready for the next step… which is
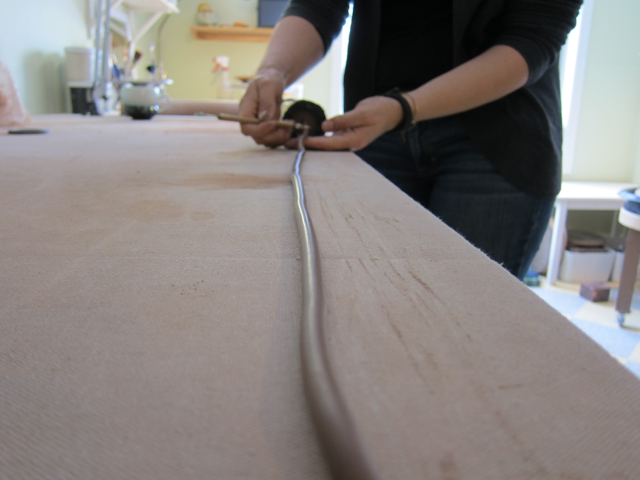
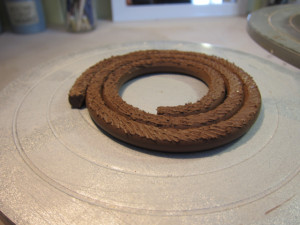
Extruding the foot.  16 extruding
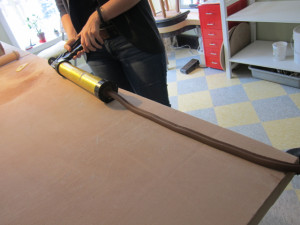
This is her extruder and templates.13 extruder templates

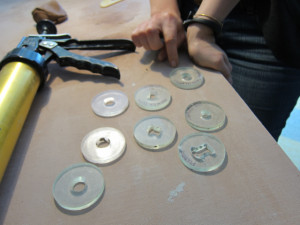
Kip has used old credit cards or 2 thicknesses of yogurt container tops to make her templates but she finally had these made. This is the one for the foot.

14 custom templateThey are beveled to enhance the compression. She has marks on her table for the lengths she needs for the various sized plates she makes. So smart!15 lengths marked on table

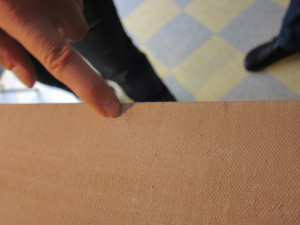
If she is doing a lot of these, she will immediately wrap each one in plastic. It’s a lot of surface exposed and it can dry up fast plus it needs to be flexible!17 extruded piece

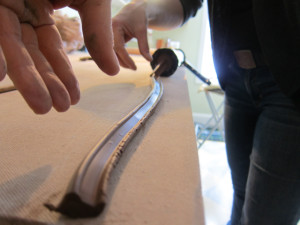
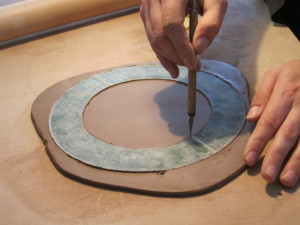
She curves her extrusion a bit while she is scoring the plate bottom along that line she traced earlier 19 scoring
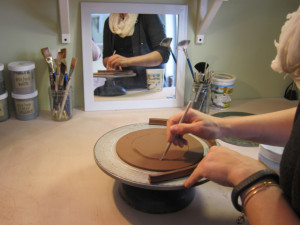
all the while, dipping her scoring tool in water. She then scores the extrusion and begins attaching it. 21 applying foot
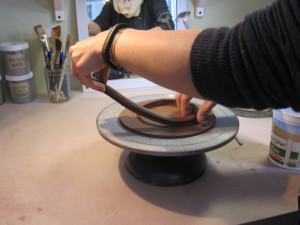
When she reaches the end, she does not leave an overlap.

23 abbutted- no overlap

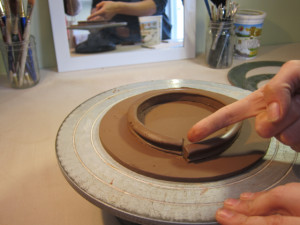
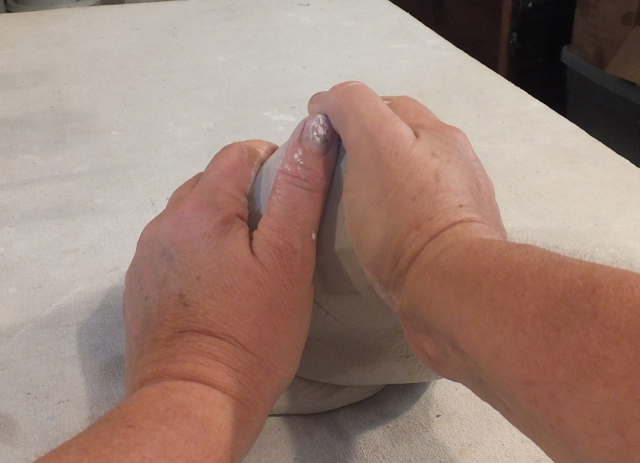
She scores the ends and butts them together, compressing and smoothing with her finger. 25 abutted
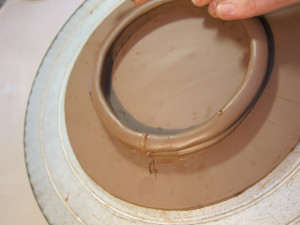
She presses the foot on very gently with her finger while turning the banding wheel.

26 smoothing


Now she will pay attention to finishing the attachment area. First she brushes it with a damp paintbrush and

27 smoothing joint wiht burch

then uses this tool

28 a THE TOOLto go in on the outside to clean it up and compress it

28 b smoothing joint with tool

and on the inside and make a bevel that will aid later in curving the plate.

30 adding bevel with tool

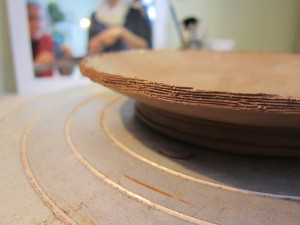
This is another stopping point. These flat plates will be set on top of plastic 32 waiting to be leather
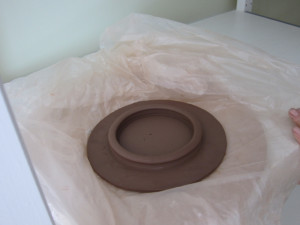
and let dry to leather hard. If Kip is making a dinner sized plate, she would have set it on a bat instead of directly onto the banding wheel but the dessert plates are small enough to lift fairly easily.

31 picking up to store- this sits til leather hard


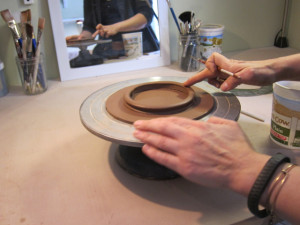
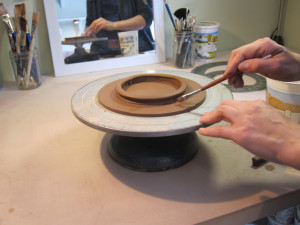
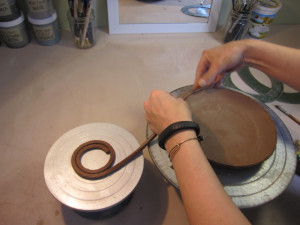
Once the  plate has set up, Kip works again on the banding wheel and in front of a mirror.

33 working the leather hard with a mirror

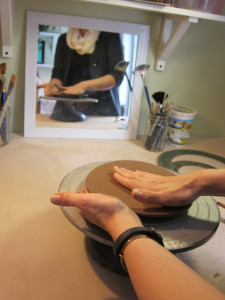
The mirror is invaluable in helping her see the rim and plate and keeping it even as she gently curves it,

36 using mirror to keep it even

she goes around the rim pinching and thinning it out toward the rim.

35a pinching out ward to rim35 pinching out ward toward rim to thin it

She also pushes down the center gently  with a yellow rib. If you want a more dramatic dip and differentiation between rim and plate, you can really go in there and push down.37 using a yellow rib

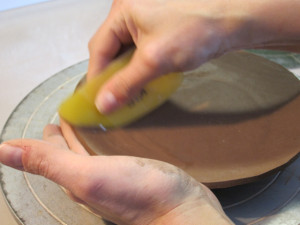
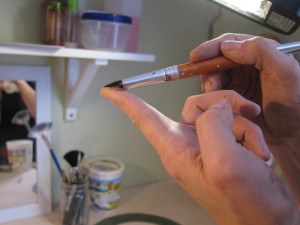
She cleans up the rim with a sureform type file and angles it slightly in. She also scores it with her pronged scoring tool.41 filing edge

42 scored rim

Then it is time to extrude the rim.39 extruded rim piece being cut

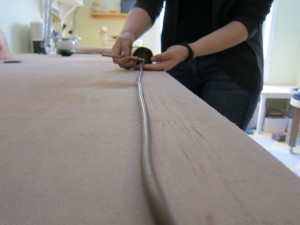
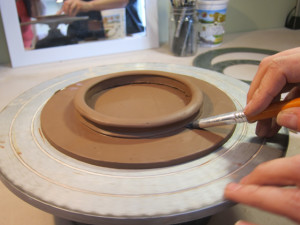
She immediately coils this up to make sure it doesn’t crack later. She sets this piece on a smaller banding wheel next to the banding wheel with a plate on it.40 coil it up immed. so no cracks


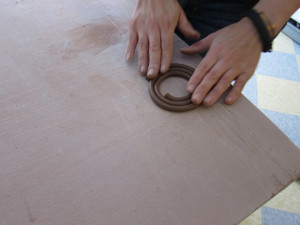
The rim of the plate is wet-scored and then the rim is wet scored with a ridged rib all at once.43 scoring actual rim  with serrated rib

44 scored rim
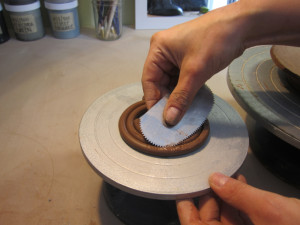
Kip then attaches the rim.

45 technique for putting rim on- 2 spinning banding wheels

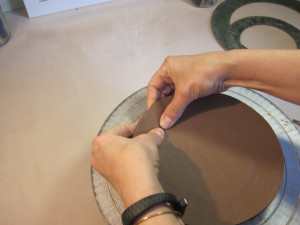
This time she does leave a slight overlap but47 leave an overlap 
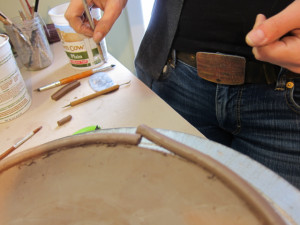
she abuts the pieces48 abut and work it in compressing 
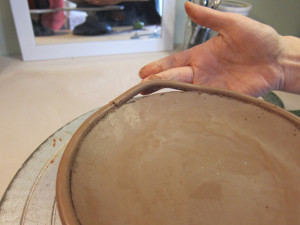
and then compressing, and working it along, she moves that part of the rim in and attaches it. This is to keep the rim from cracking- it has to do with attatching a slightly wetter piece to the leather hard- at this point the rim will shrink more than the plate body.

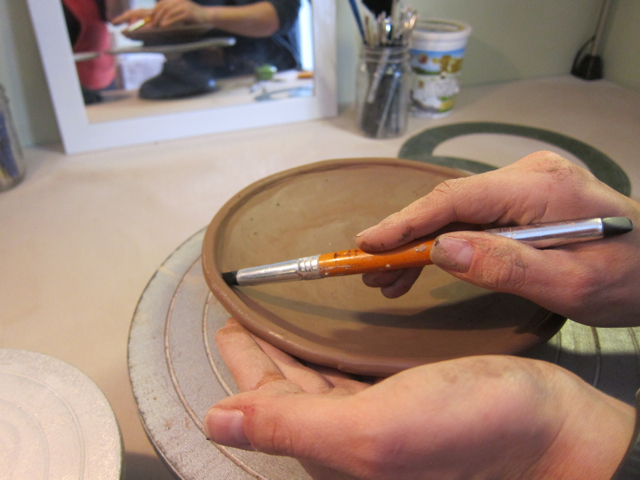
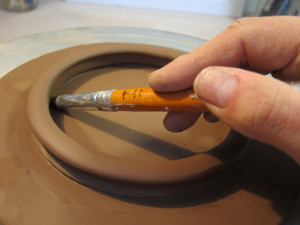
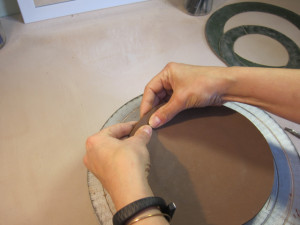
She goes around the rim now; first with a damp brush, then a wooden tool and then the beveling tool which she uses to make a line. 49 the tool beveling againThis makes the application of her latex easier and she fills it in later with slip- the latex keeping the rim clean and bare.54 finished rim to compare

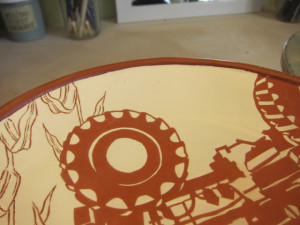
On the underside, the rim must also be smoothed and beveled and then a crack that inevitably forms when the curving is done must be addressed.55 this cracks here from the curving process 
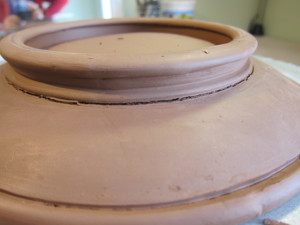
A wooden tool and then finger do the job.52 then this stick tool 
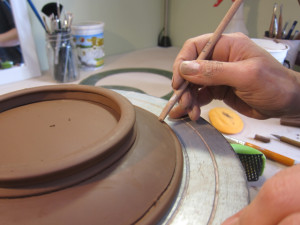
and the beveling tool is used again.51 bevel again


Another natural stopping point, the plates could be wrapped for days until kip is ready to latex them. I will do a second post talking about Kip’s decorating process.

For now, you are left with a  super lightweight plate that looks thrown!