
These “Fossil Pavers” are so named because you are inlaying the lighter clay into the larger Terra Cotta paver body. This is a fun and useful project for all ages and can be a lasting decoration for your garden or house (provided you have access to a kiln!)
I taught this class a few years ago at Lill Street and again recently at the Northern Clay Center.
At Lill we did it as a family workshop and what is great about this project is children as young as 3 or 4 can help lay out the design. You’ll need something round to trace- about 12″ across.
We used 2 kinds of clay. Continental Clay’s Terra Cotta will fire nicely to Cone 1 which is what we did so that the pavers would be essentially non-porous for wintering outside and also extremely dense for the strength needed to be able to step on the pavers.
Start with your light colored clay (porcelain, light stoneware or raku clay) and make your design. Make it as fine as possible as it will spread out when you flatten the terra cotta over it. When rolling coils, if they are drying and consequently cracking, roll them on a little patch of dampened table- a canvas covered table is ideal. If you are cutting out leaf shapes, make the clay as thin as you reasonably can- that means less than 3/16th of an inch! More like an 8th of an inch or less. The reason for this is so that your paver won’t be lumpy and the white clay not fully integrated into the surface of the paver. These leaves are a little too thick and caused a bit of trouble getting them to fully integrate.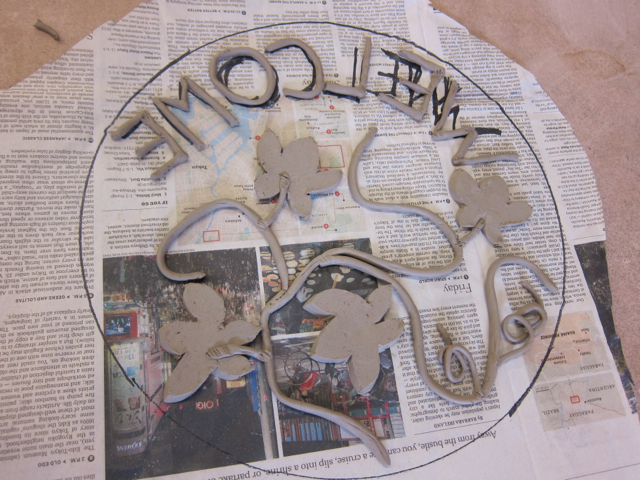
Lay out your design on a piece of board or paper! We found it helpful to draw the pattern on a piece of paper and to trace our circles so that we knew the boundaries of the paver and could lay out the design well within it.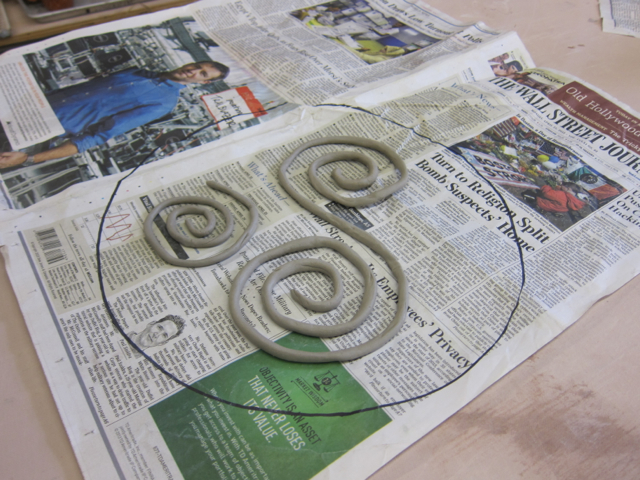
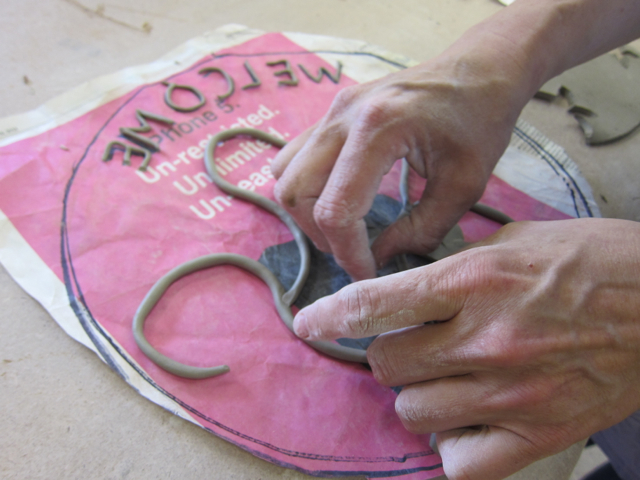
***IMPORTANT NOTE!*** Words must be laid out in mirror writing. This may seem really hard but you can lay out the word and then simply flip it over. You can see we have the world “Welcome” backwards here.
Also important to keep your white clay pattern moist- spritz it before you set it aside and again before you put the terra cotta over it. Make sure it does NOT sit in water! That will make it too soft and it will smear.
And before you throw a slab and shake the table, MOVE your layout! Several layouts were shaken to bits before we caught on!
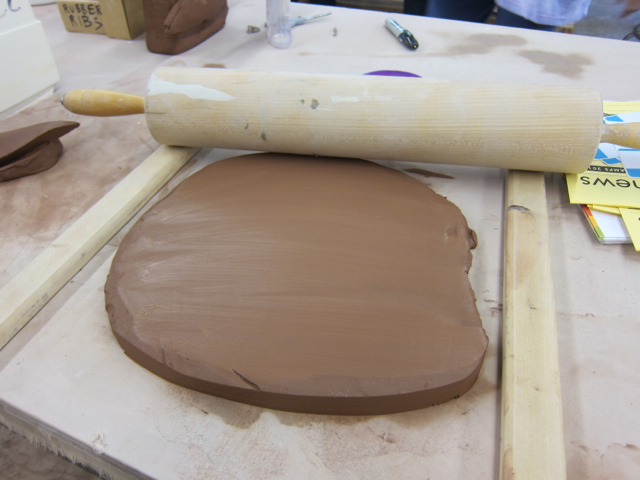
Next, throw a thick terra cotta slab and then roll it to about a ½ inch thickness. You can do this using two half-inch thick boards on either side of your slab. You will need a long rolling pin though! We needed about 7-8 lbs of clay to make a 12 “ circle.
Before your lay your finished and smoothed terra cotta slab over your design, wipe the surface with a sponge and spritz your design.

Then starting at one edge, lay your slab carefully down over your design and using the flat of your hand pat/smack it down firmly over your design. You can also go over it gently, firmly and evenly with the rolling pin. It’s okay if it gets thinner than ½ an inch- but not too much!
It is important to lay the slab over the design instead of vice versa to give you a very uniform flat surface where the clay pushes down to the level of the light clay’s design.
Now you can flip it over by sandwiching it between 2 boards or simply picking it up and flipping it over.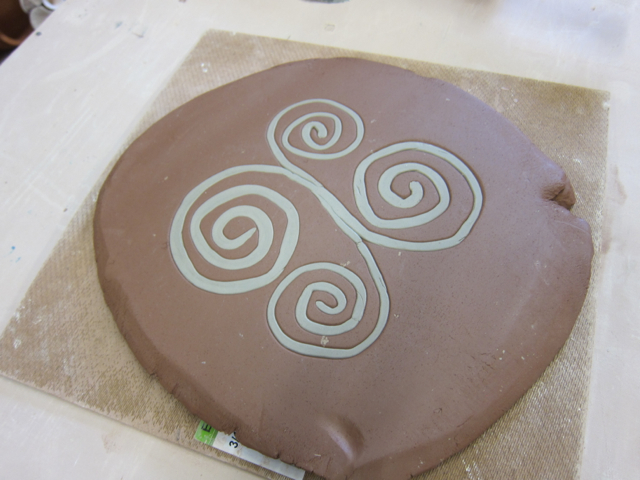
If your design is still sticking up, you can gently go over it from the front with a rolling pin too.
After that, lay your circle pattern over the slab, covering your design and cut around it.  Go over the edge with an dampened sponge to soften the corner and get rid of sharp chip-able edges.
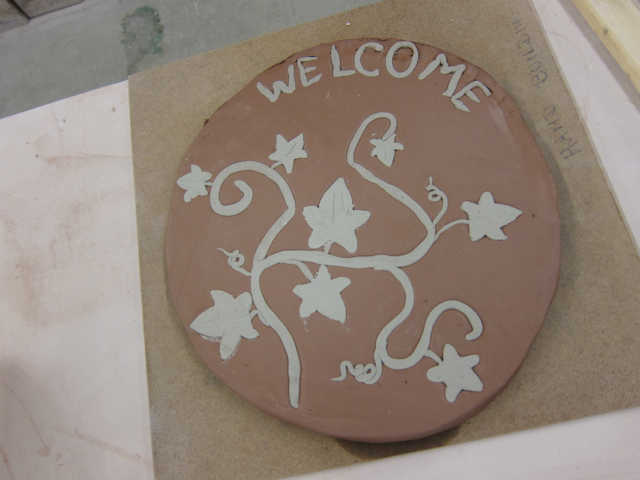
Let dry thoroughly and fire to Cone 1!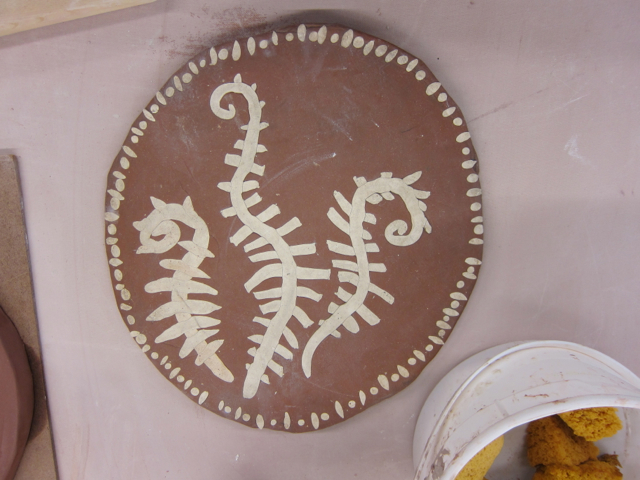 Here is my fired fern paver example from Lill. I was working very fast to make the example as I had young kids waiting to work! I’ve had it for years now, left outside in the winter many times and it’s still intact!
Thank you for sharing this great idea.
Great idea Glynnis. I guess you could add body stains into the white clay to create more of a palette. It also gives you the option of slumpling the whole slab into a shallow press mould to create a dish.
thanks! I agree, it’s a great idea to use any number of colors and it certainly doesn’t need to be flat unless you plan on standing on it!
I did a class project where everyone made a “fossil” about 2 inches in diameter and I joined them all up in a bowl mold and sold the bowls at a school auction.
Thank you for reading Patricia!