This will be my page for students in my First Time Potter class to use as reference.
There is so much information we are trying to get to you in 5 short weeks that I thought I would have something for you to refer back to.
Many of the systems I will refer to here are specific to Lill and should be helpful navigating their system for getting pots from bag o’ clay through the shelves, kilns, carts, etc. and eventually back to your house.
Class 1 Handbuilding
What we did:
We made pinch pots
We made mugs using the SLAB METHOD and stamped them.
We made Piggy banks using the double pinch pot method.
Simple pinch pots are lovely little pots because they are the ultimate expression of human scale. A simple pinch pot with no add-ons can typically grow to a certain size in your hand. It can only be so deep or wide; it’s limitations set by the size of your hands.
Tips for good pinch pots:
Don’t leave too much clay at the bottom. Don’t pinch the rim– but just under the rim- that will leave you with a nice thick and strong rim which will help keep the shape of the pot. Keep the walls as even a thickness as possible; avoid thick spots.
KEEP YOUR THUMBS ON THE INSIDE.
Legs: a tripod (three legs) is by far, the most stable.
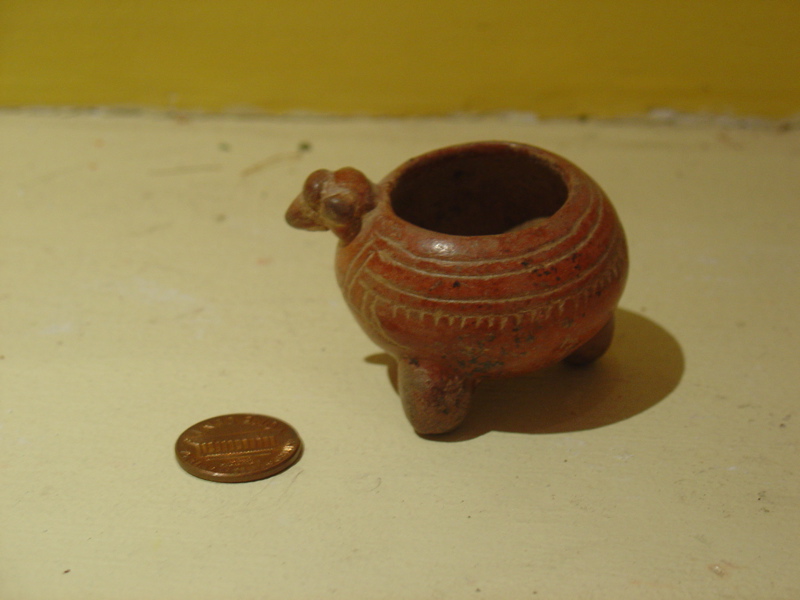 The Mayans knew that and since they didn’t have lots of tables, many of their pots have three legs so they could be set anywhere. I got this wonderful tiny (never been broken) Mayan pot at Harlan J. Berk Ltd. and it’s a pinch pot!
Note the animal head and the lovely burnished, incised terra sigilata.
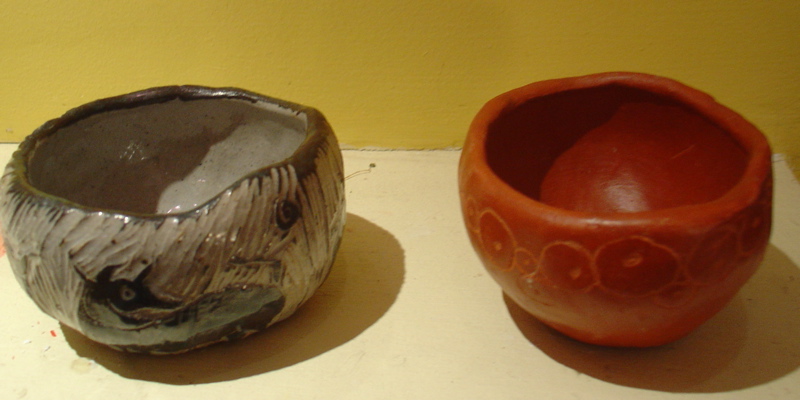 These are two pinch pots I have made. The one on the left is high fired, with clear glaze over sgraffito’d slip; the other is low fired with a simple Terra sigilata burnished on and circles carved for decoration. We use the high fire pot all the time. I keep rubber bands in the Terra Cotta pot.
Tips for slab construction:
If your slab is too uneven, use a rolling pin. Don’t forget to “erase” the canvas texture that you pick up from the table.
Don’t make your slab too thin as it won’t be able to support itself – a good 3/16-1/4 inch is a good thickness. If you’ve been working with your clay too long, it will get dry and tired and start to crack. That clay can be recycled – just use fresh clay.
Always always support the clay when you push on it. For example, if you are pushing on the outside towards the inside, put your hand inside your pot to have something to push against instead of caving in your pot.
Push clay firmly together to join it. You may score the surfaces and use a little water as you would glue. Blend the clay so no join marks remain.
Keep an eye on edges that hands or mouth will touch. The clay is soft when you work with it but will become like stone when fired. Look for thin, sharp, or rough edges and smooth them.
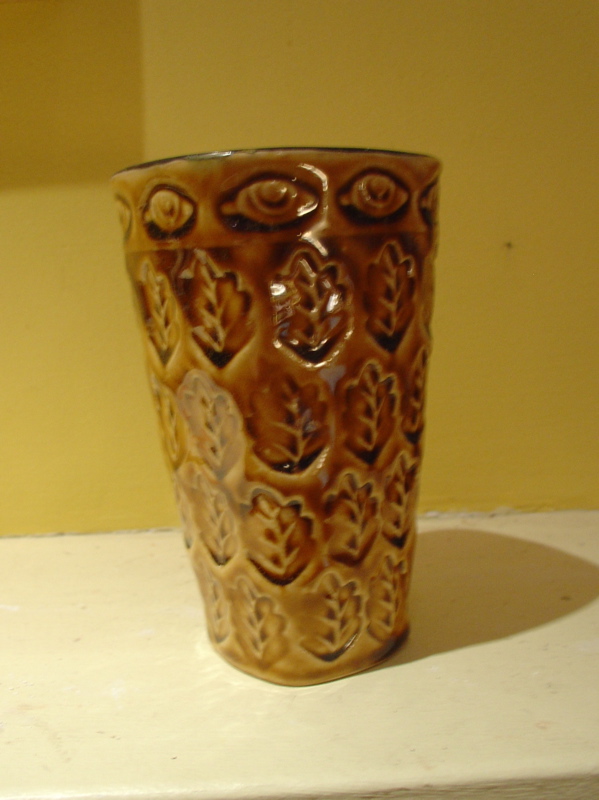
I just happen to have this lovely stamped, slab constructed tumbler by Chuck Aydlett which is a wonderful illustration of our slab cup project this week. Note his use of stamps.
For double pinch pots, it is more important than ever that you squeeze below the rim and leave a thick rim as you will be attaching the two rims together. It helps to make the balls of clay for the pinch pots at the same time so they are the same size and the openings will match up when you put them together.
Once air is trapped inside you can roll it and push on it and the trapped air will keep the hollow form from collapsing. Remember though!!! Make at least a pin hole for air to escape for firing. It can be the last thing you do. Otherwise the hollow form could explode.
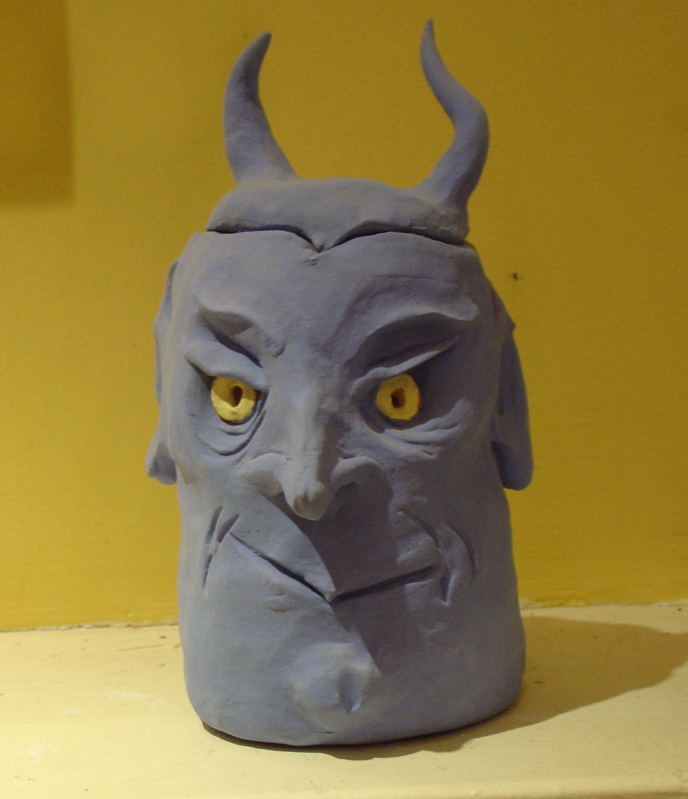 I started this blue devil as a demo to be a cookie jar. I was thinking about how bad you can (or should?) feel when you reach for a cookie and this guy appeared. He’s empty now but he cracks me up. He was a double pinchpot and you can see how you can shape those and add things to them. He is low fired with just an underglaze to keep his skin nice and matte.
I like to think I’m a big picture teacher.
I try to explain things in a way so that they fit into a pattern, so that the student can get an overall picture of where they are heading. I don’t like giving stuff to students in a step-by-step fashion where they don’t know the why of what they are doing.
Then you get people waxing the bottoms of their pots before they glaze them – as they should -but they have no idea why and they don’t grasp that it is to repel glaze and that they must wipe off the beads of glaze that are still there. And then there’s the why of not having any glaze on any part of the pot that comes in contact with a kiln shelf.
It’s too hard to instantly assimilate all the information to do with the making of pottery. It’s easier to remember the big picture; systems, why’s and general principles.
I also think a good teacher, an experienced teacher learns where students can get off track- go astray in the steps of a process and a good teacher can head them off at the pass so to speak- they can know those spots and keep the students headed in the right direction.
Let me give you a couple of examples: coil pots- seems easy enough, you make some coils, stack them up and blend them together to make a pot.
But if your student starts off right away with thin little coils, they are going to have a very hard time stacking them. It’s much easier to make fat coils and then thin out the pot wall after you’ve created it.
If you let your students make skinny little coils, they spend the rest of their time trying to get the coils to stick together, trying to get the pot to hold together, trying to fix all the holes that appear.
Another example, I noticed students get a huge amount of 2-D training- everything is made on paper or out of paper. Students don’t get a chance to think in 3-D much so when it’s time for them to make a shape out of clay, often they’ll make the clay flat and cut it out. Of course, clay is much stronger when you roll it; not when it’s a slab.
When I have students make human figures, I always warn them off of making a guy I call “steam roller Bob” this poor guy has obviously had a bad run-in with a steam roller and he’s floppy and weak and can’t stand up or do much of anything.
When one knows the places that someone inexperienced with clay can drive off the road, then you put up guard rails at that point to head them off.
That said, here are the basic set of steps to get the clay from bag to finished product.
1. Make your piece. (wet stage)
2. Make additons or trim it (leather hard)
3. Set it on the greenware shelf to be fired (bone dry)
4. Find it on the Bisk cart- it will look pinky-white- remember, it will have shrunk a bit- having a clearly written name on the bottom helps a lot!
5. Glaze your pot, wipe off the bottom and leave it on the glaze cart
6. Watch for your pot on the finished work carts! It’s always exciting to get work back!
Have a great week!
