
I have been a huge fan of the Mata Ortiz pottery ever since I learned of it through a children’s book quite a few years ago. It’s mentioned in my earlier post about Mata Ortiz where I write a bit more about the story of this small town in Mexico; I received some pots for my birthday one year I enthusiastically wrote a post about it.
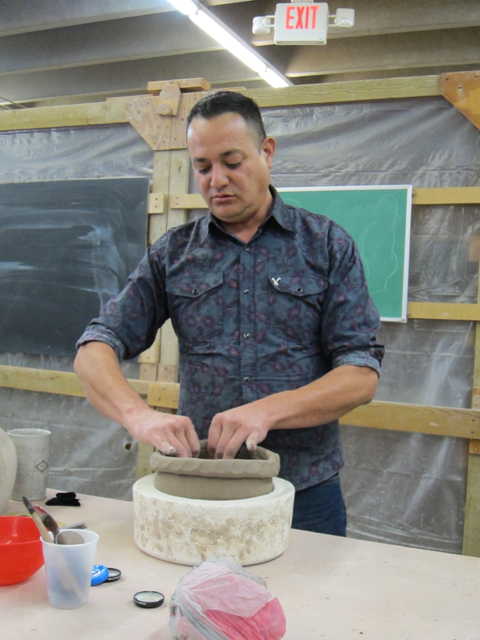
So, when an opportunity to attend a workshop taught by Eli Navarette was offered at the Northern Clay Center, I was thrilled to attend.

Eli was a really nice guy, open, knowledgeable and helpful. He taught the class in Spanish with a translator. My Spanish was good enough to understand him, ask questions and help translate occasionally.
He started out with a plaster “puki” which is a bowl-like mold that really helps hold the pot’s bottom shape. He made a large, fat “tortilla” out of his own clay, which he brought from the Mata Ortiz area.
While he did that, he passed around the clay which was very different in feeling from the clays I am used to working with here. It was very plastic and yet, somehow drier and also very strong. He said he mixed 3 types of clay together- his own recipe- one for weight, one for strength and one for plasticity. It was a very effective clay for the kind of handbuilding he was doing. He explained how he and other potters get all the clay from that area and how they prepare it. Basically , they dig it up, mix it with water in a 5 gallon bucket and let the heavy particles and stones and other things fall to the bottom. The excess water rises to the top which they pour off and take out the middle part to use.
They also get all their colorants from that area. More on that later.
After he had pinched the fat pancake up into quite a large part of the pot – and it was not thick! -he added a coil.
I was amazed because I though he would have to let that bottom part set up for a quite a while until it could support the weight and the action of adding another coil.
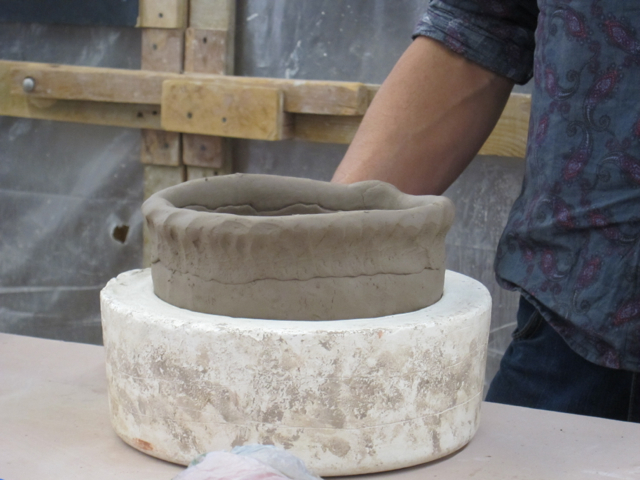
But I was wrong, the clay, under the skilled hands of Eli, had no problem supporting the next coil. After adding that coil he smoothed the inside with a blue rubber rib and scraped the exterior with a piece of hacksaw.

thencut the rim off to be even again for the next coil.
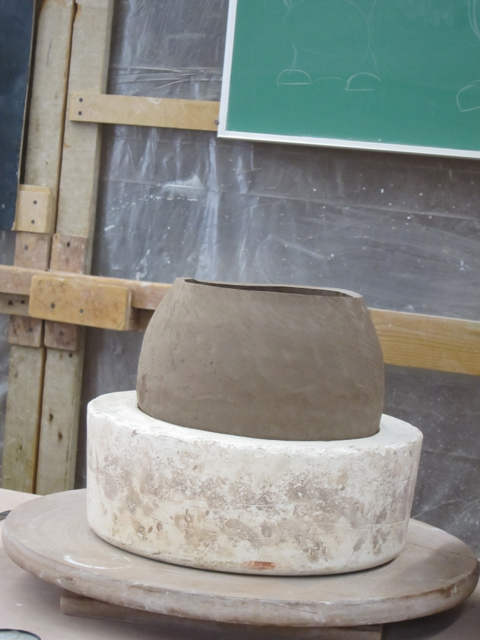
Then another coil
and voila! a really sizeable pot all in a very short time.
While he was working he chatted about how he came to be a potter.
His grandparents were living and working in Mata Ortiz but he was living in Chihuahua (the city) he can remember since he was about 7 years old seeing them working with clay but it wasn’t until a visit there when he was 22 and had already trained as an electrician that he decided he could and wanted to make pottery. It took him about 3 years to learn how to do it and now he lives with his wife (also a potter) and 2 children in Casas Grandes about 15 minutes from Mata Ortiz- if you take the new road. Both his brothers are potters, the youngest having started doing it first. He said there are now 3 generations of potters, 600 in all! They’ve been making the pottery there for 50 years. And there are young kids already learning about and working in pottery -that would be the 4th generation.
Next up was decorating the pots. He told us he sands the bone-dry pots with 3 grades of sandpaper, ending with the finest grade. I asked him about what precautions he takes to avoid breathing in the dust, a health hazard, and he said he works outside and/or wears a mask.
He then takes manganese mixed with clay- so, technically a slip, not an oxide- and applies it to the entire surface using a scrap of velvet. He said if you don’t mix the manganese with clay it doesn’t “stick” to the surface. Then after that had dried- a matter of a minute or so, he applied a solution to help with the burnishing.
His recipe for this burnishing solution was very interesting. He puts 5% finely ground Graphite and 5% baby oil into kerosene (90%) and applies that with his hand over the black manganese slip. There was some discussion about using just baby oil or baby oil and graphite and also soap- both of those work but leave considerably more streaks.
Then he takes an agate, highly polished –sometimes they sand them- but this looked like it was out of a rock tumbler and he said they used that too and begain to burnish.
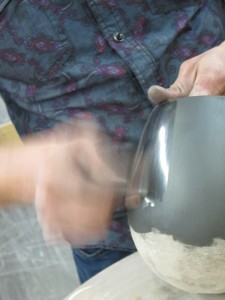
Immediately the surface was a brilliantly shiny black.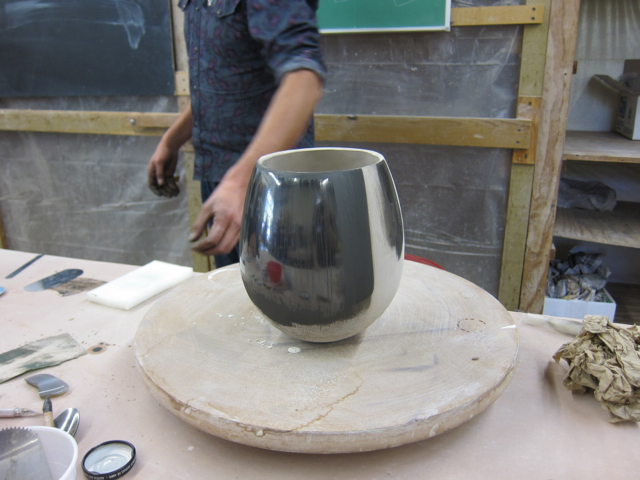 He said he puts 3 layers on burnishing each layer and by the 3rd coat is wearing cotton gloves so as not to put any oils from his hands onto the surface. You can see how reflective it is in the photos. You can also see that there are some streaks- that is why he does 3 layers.
Next he revealed (from under a cloth) a piece he was working on. He apologized that the black surface was only 2 coats and began to paint some lines with a brush that looked like just a few hairs but quite long.
  he painted on very fine lines. Here are his brushes!
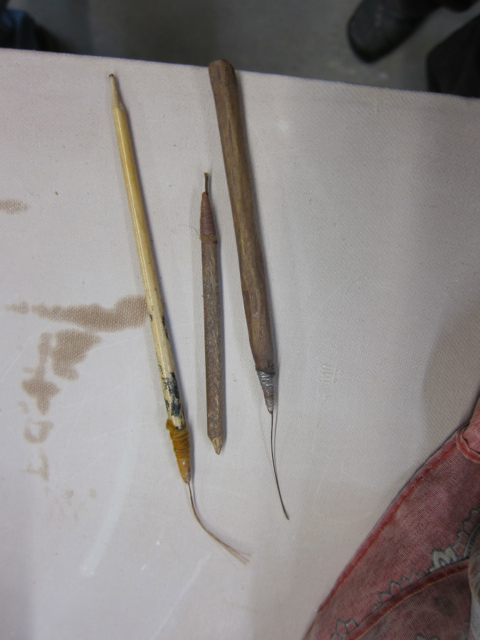
He brought small amounts of his colors with him; white, orange and red in addition to the black. These are also slips because they are colored clays.
Despite being so shiny, the surface is still absorbent. After he has put on the lines he goes back in with a much shorter brush and fills in 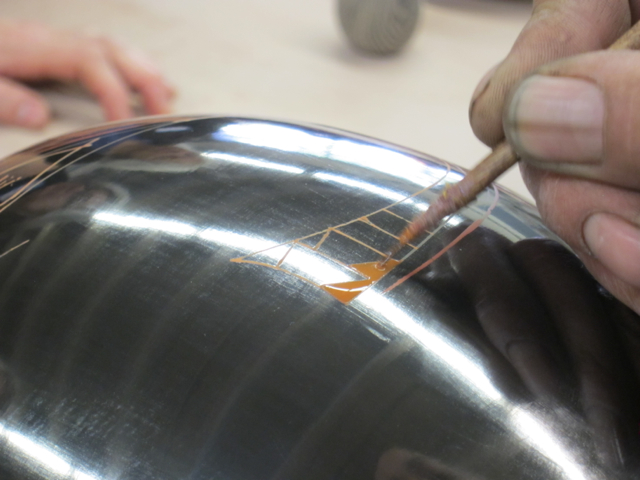 We all gathered around him to watch him paint, it was mesmerizing.
He told us it takes 3 days to make, dry and sand a pot, 3 days of polishing and at least 3 days to decorate the surface. I think the polishing days are not 8 hours of continuous polishing (though I could be wrong) but that each coat is applied, polished and left to dry. He was very clear about the surface decoration, 1 full day to paint on the lines- with just a few breaks for eating, stretching, etc. another day to fill in all the spaces and a 3rd day for corrections- that is where he takes a rounded tipped stick and gently rubs off lines that are mistakes.
So each pot is a considerable investment of time.
Then we made our own brushes! He had just a little hair for us to use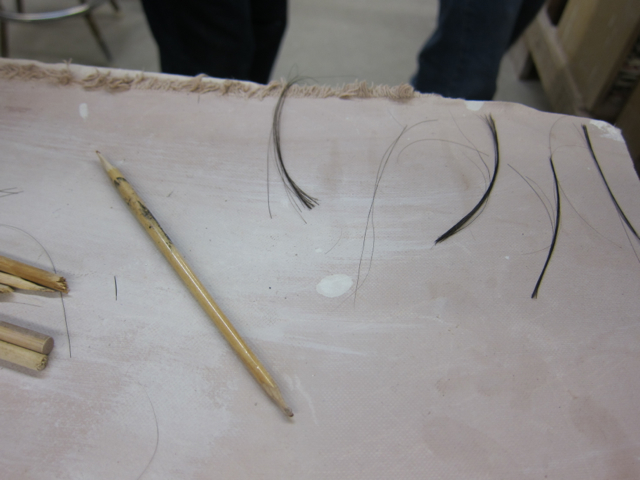 but we were very lucky in that one of our participants was willing and generously allowed some of her beautiful straight hair to be snipped off and distributed.
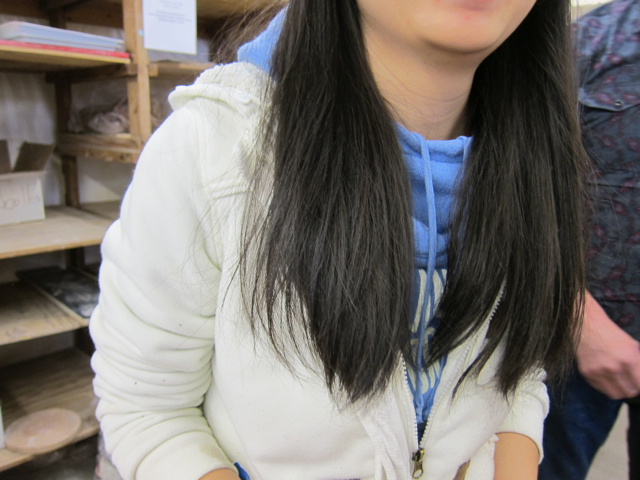
Here is how you can make your own brush (and I’m sorry I didn’t take more photos- I was making brushes!) take a stick, like a small dowel or a fat skewer and sharpen it to a point. Cut a straight groove running out to the point to lay the hair in. The hair –which should be about 2” long at least can be dipped in water as often as you need to make it stick together! Lay it in the groove, overlapping the stick about an inch and wrap sewing thread tightly around it, binding the hair to the stick. Leave out a bit of thread sticking out to tie a knot when you are done. When you get to the tip, do one loop just around the hair to keep it together and then wind back down around the stick, now laying the thread right next to itself, covering the stick end completely. When you get back to where you started and left that thread sticking out, tie a knot. You can use nail polish or epoxy to seal the thread and hold it in place. We used roughly about a yard of thread.
We all made at least one brush and used them on tiles to practice some of the techniques he showed us. I will add a photo of my tile when I get it back.
Lastly we talked about firing and how he fires and how the Mata Ortiz potters used to fire.
In the early days, they would be out in the street and set their pot on an already fired cylinder then cover the pot with something like a large ceramic flower pot or a metal garbage can or something that just fit over the pot to protect it from the fuel. Then they would stack wood all around it, completely surrounding the makeshift saggar and on top of it and light it up. They managed to generate enough heat this way to get the pot hot enough to undergo what is called Crystal Inversion which is when the clay permanently changes and is unaffected by immersion in water any longer. Before crystal inversion, a pot can be recycled and turned back into a lump of clay just by getting it wet.
I confess it was not clear to me whether Eli currently uses gas to fire his pots or an electric kiln. What was abundantly clear was how amazing his clay was in that it could be heated up quite rapidly and cooled incredibly fast. He had a pot (which I now own!) made by his wife (who was ill that day and could not teach with him) that we popped into an already warm kiln. The kiln was taken up to 750 degrees centigrade (that’s Cone 012- 1382 Farenheit), left at that temp for about 15 minutes and then cooled within an hour and a half to where we could handle it! We took it out of the kiln when it was at about 450 and stuck it in front of a fan! The pot was fired in about 3 hours! Nothing exploded or cracked or showed any signs of stress at all! Interestingly, the colors were dull when we pulled out the hot pot
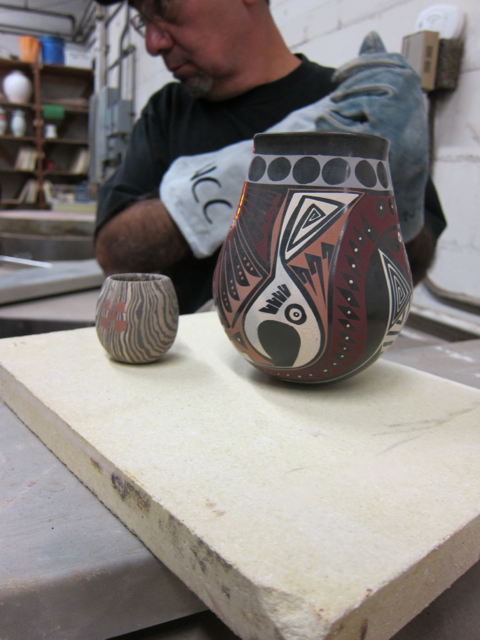 but they brightened as the pot cooled.
I think what I love about the Mata Ortiz potters – besides their spectacularly beautiful pottery is that they are working much as their ancestors did. They use simple methods that they discovered themselves. They are always trying new things and sharing knowledge. They work completely locally, using the materials at hand and in doing this, they have dramatically raised the standard of living in their area!


