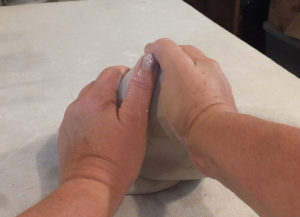
Wedging: it’s not about air bubbles!

Wedging. Who writes about wedging?

Isn’t it to get the air bubbles out? (NO!) And wedging is one of those zen practices that supposedly take 3 years to learn to do right?

Or, is it, in my experience, to get an internal coil going in your clay so that when you are throwing and you start to center on the wheel, your clay doesn’t fight you and centers up easily?

Why we wedge is something many potters know or have known throughout time but is still something I think should be discussed again; especially for art educators out there.

For years and years  and still! I have wedged Japanese style; spiral wedging (pointy end under my left hand, right hand on the fat- butt-end) with the spiral  at the fat end of my clay- running counterclockwise. That is, if you looked down on the fat end and imagined the spiral turning, it would spin into the center going counterclockwise.

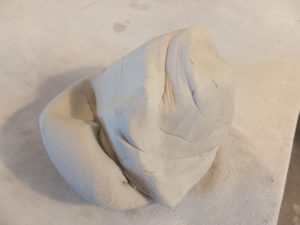
Yes, I painted on the clay to try to show the spiral direction- which is counter clockwise when the fat end is pointing up- but when you put it on the wheel- it’s going clockwise!

Then I  plopped that fat end of the clay down on my wheel-head and proceeded to throw American style with the wheel running counterclockwise (and the internal spiral going against that- clockwise) and I would very frequently have to battle my clay a bit to get it centered.

So often,– and especially after I got really consistent and more skilled at throwing– I noticed my clay would just refuse to totally center. It would get this little blip- a wobble, a part that seemed like it simply refused to settle down and let me get the clay all-the-way centered and I knew I was doing everything else right. Even if I coned it up and then brought it down just right, there would be that little blip again that I would end up trying to work around. Or, after I got the walls pulled, I would wonder why my pot would suddenly get some sort of odd wobble in it for no apparent reason.

Why did my un-wedged smaller lumps of clay behave so much better? For a while I gave up wedging anything that came straight out of the bag but for large pieces, it was pretty tiring getting it centered.

Finally, overhearing another teacher at Lill Street mention offhandedly something about the spiral helping to center the clay and, at some other point, after beating my clay into submission yet again and feeling like I was not going to always be this strong, a careful examination of the direction of my coil came the realization that the way I wedge was Japanese (the wheels in Japan go clockwise) but my throwing is western ((American wheels spin counter clockwise)

And it takes a fair amount of visualizing to figure out which way the internal coil in the clay is going once you’ve popped it onto the wheel. The fact of the matter is, it was pointless to wedge my de-aired, pugged clay if I was going to put the internal coil going against the spin of my wheel!

note!!!!

I don’t know how many countless people, students, educators, etc, have asked me, “don’t we need to wedge the clay to get the air bubbles out?” The answer is an emphatic NO!

Air bubbles in and of themselves are not a problem! It’s only the moisture* they hold that cause explosions. If something is properly dried, you will rarely have explosions.

So please don’t waste your time or your students’ creative-time wedging clay that has been already de-aired in a pugger- i.e. any commercially made clay- clay you would buy in a box.


This clay has been de-aired in a  pugmill. There are usually no air bubbles in it!

In fact, improper wedging will more often add bubbles and you willl just dry out your clay in the process.

Simply make sure the pieces get enough drying time and have no plaster mixed in with the clay- that IS a sure recipe for explosions.

So why DO we wedge?

When it is for throwing**, it is for getting an internal coil in the clay so it is easier to center the clay. I do not wedge anything under 2-3 lbs if it comes straight out of the bag,I save that effort of wedging in an internal coil for larger pieces of clay when I would be wrestling to get a piece centered.

Here is how I currently work: any clay straight out of the bag under 2.5 lbs does not get wedged.

It is airless and too small to matter. 2.5 -3 lbs get wedged the new way trying to train my poor hands to reverse their roles and anything over 3.5 lbs is wedged the old way and then flipped over.

Did I find it easier once I flipped my wedged clay upside-down onto the narrow point but with the internal coil now “tightening” when my wheel head went around?……Immensely.

All those old problems disappeared and it was much easier to center. Just recently I forgot to flip a wedged piece, began to center it, felt the blip and realized what I had done and so I actually cut it off the wheel and turned it over and then it was just fine. What a great illustration of what I had been learning.

And yes, I mentally slapped my forehead for not figuring this all out years earlier!

Oh well, better late than never and since I did not figure it out for so long, I thought I would share what, in retrospect, seems like an obvious fact with all you out there who may have also missed it.

*Why is moisture a problem? Once the clay hits the temperature of water boiling, any water will, in fact, boil and turn into rapidly expanding gas which has no space to expand. The result? An explosion as the gas pushes the clay out of its way.

**There are just a few uses for wedging when you hand-build. Chiefly it would be to even out clay that had been stored a long time- say one side is a bit drier than the other. When I hand-build I use it to make sure my slabs shrink back evenly in all directions- but just take a look at my blog entry on throwing a slab vs. slab rollers for an explanation of that.

***

And while I am on the topic of de-aired clay, I had a batch of reclaim that I took to a friend’s house and used their Soldner mixer to get it back in shape. I ended up with 300lbs of porcelain filled with micro-bubbles. I slam-wedged it quite a bit but I could never get out all the millions of tiny bubbles so I tried throwing with it. It was very interesting! I could throw a lot taller with it, The clay was stiffer and a bit shorter.  “Shorter” in clay terms means that it is less plastic, it won’t stretch as much. Clay is always a balance between wonderful elasticity and not having floppy collapsing clay. In porcelain, I feel that line is even more delicate.

It was great to make a lot of tall and large things out of grolleg porcelain and I simply avoided pulling handles from it or bringing down wide rims or even making a pitcher spout with that particular clay. I used my regular clay to make handles and they fit the mugs I threw just fine. My other concern was a lumpy surface and I did 2 things; I ignored it and the bubbles seemed to flatten out in the firings and I also took a serrated rib and ran it over the whole surface while I was throwing and then smoothed it again. Neither method was perfect but I used up (and sold the end products) of all 300 lbs.

When I discussed this batch of clay with my friends who had lent the mixer, he had also mixed a batch of porcelain with similar results, a stiffer clay. He quoted a old potter who said pugging ruined clay.

This is one of those posts where I would very much welcome comments from potters who will know more about this than I do.

So what are your thoughts and opinions on wedging?

Mosaic Time Line Finished!

Whew!  I am very pleased to have finished the Murphy school Mosaic Time line.

This is the 3rd year I’ve worked on it with the 6th graders.

I am continually impressed with the level of capability amongst so many of the students there.

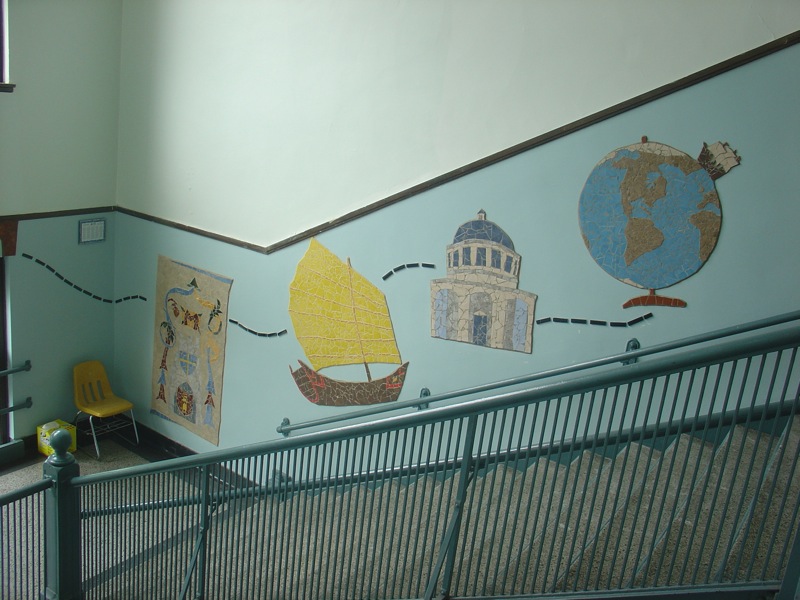
This year we added 3 more eras:

a Sampan from Feudal China,
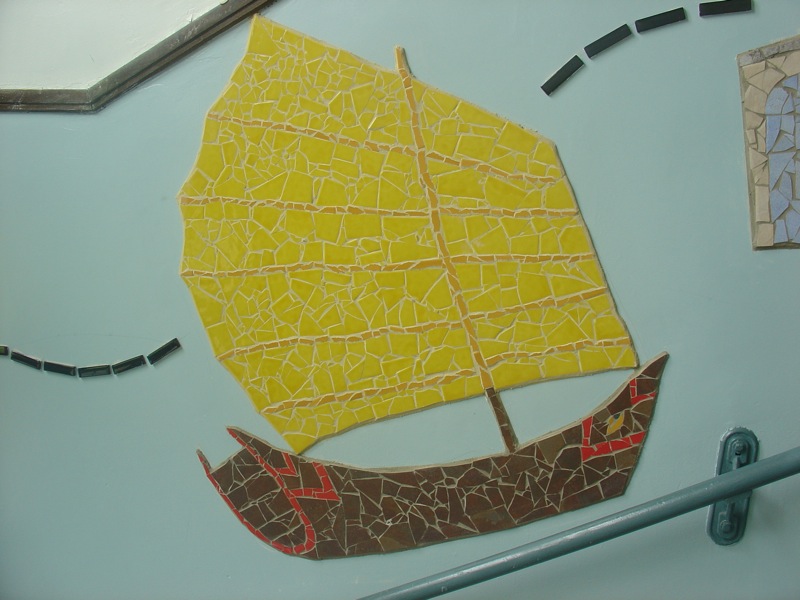
a Building from the Renaissance

and a Globe and ship to represent the Age of Exploration.

The steps of the process were as follows:

All the students drew pictures of things representing something from one of the three time periods.

I chose some images and made life-size drawings.

The kids came in small groups of around 8 to lay tile out on these drawings.
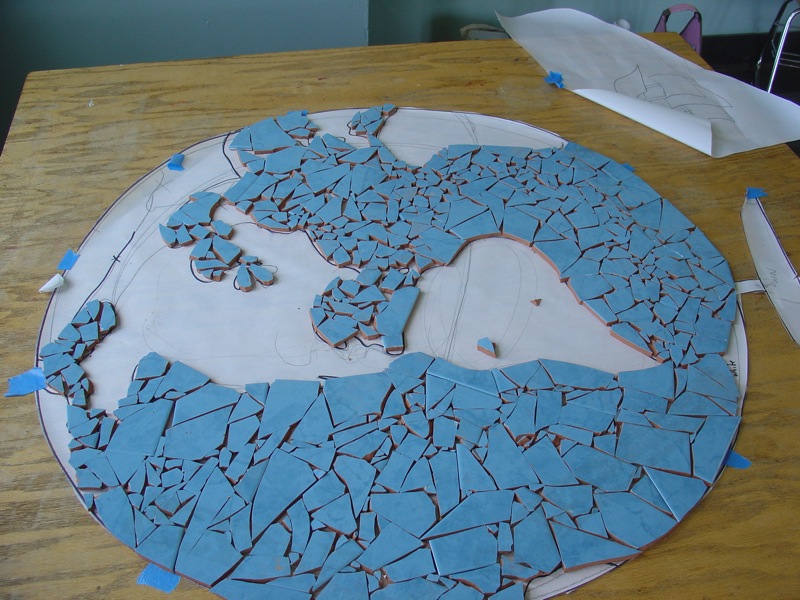
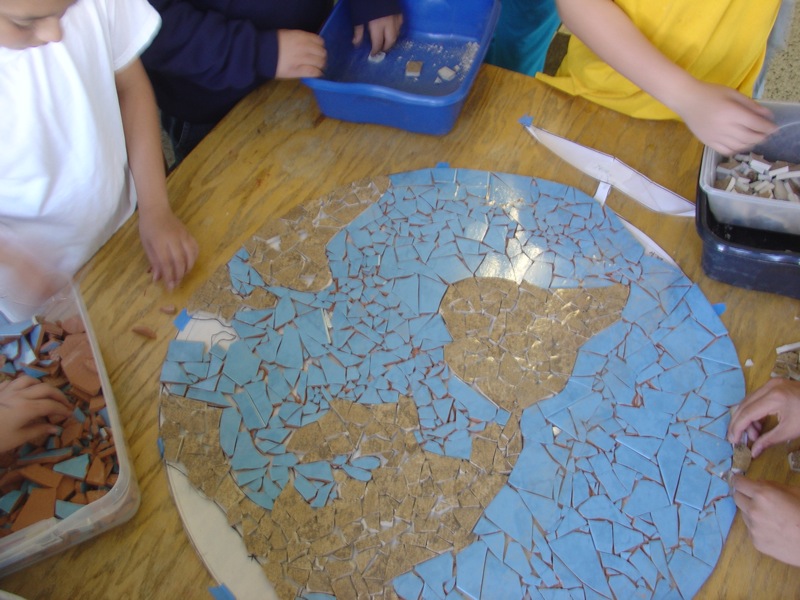
After the mosaic was completely laid out students or I taped the whole thing.

I then cut it into manageable sized parts.

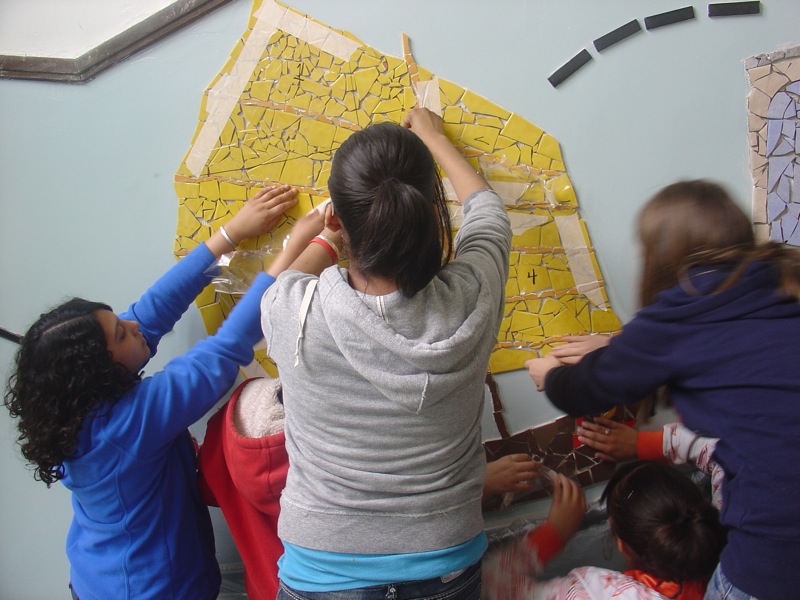
Students applied mastic
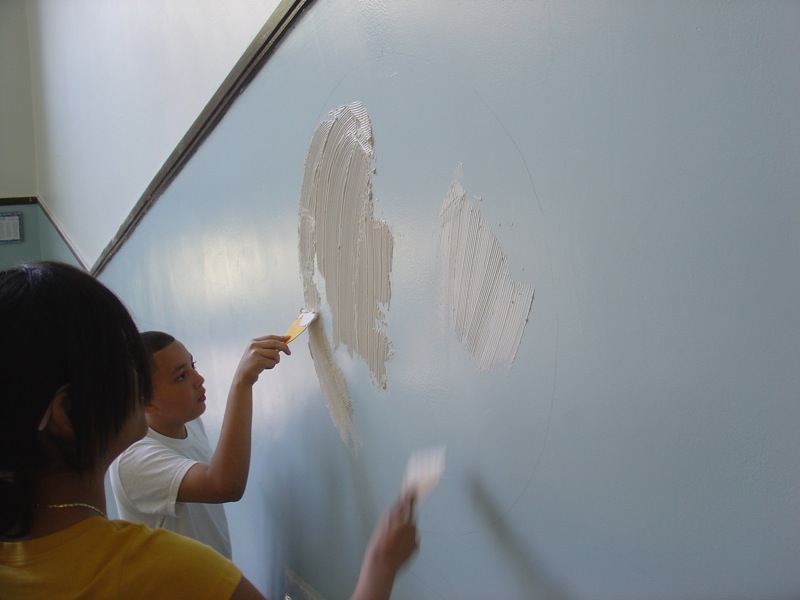
and then with two student assistants, I lifted the parts up and held them in position while my helpers pressed it into the mastic.
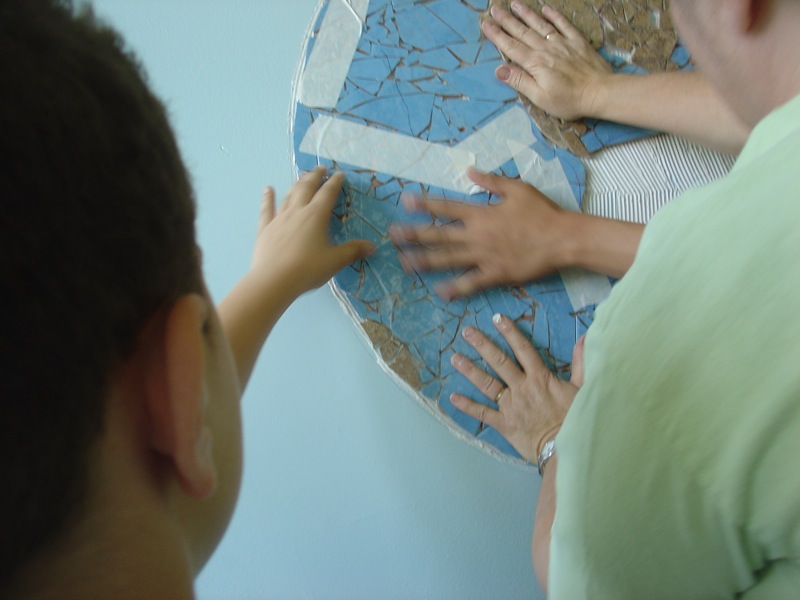
Once everything was up, the students helped me with two more steps.

I had a student glue the actual time line “dashes” individually up onto  the wall while the clear tape was being removed by other students
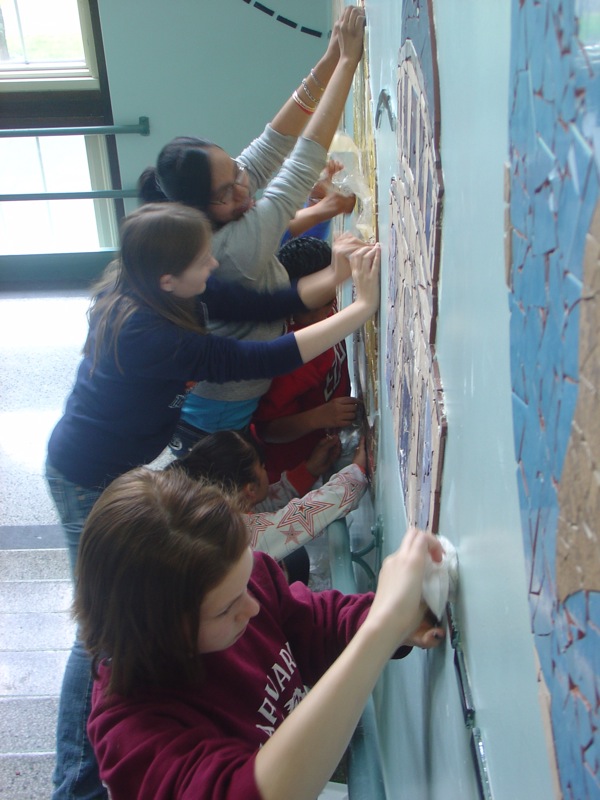

The mastic was allowed to dry for several days.

The last stage was the grouting. I put up an outline of blue tape around each mosaic to contain the grout and then I put down a drop cloth. (These drop tarps are great in that they are pre-taped and come on a dispenser roll!)
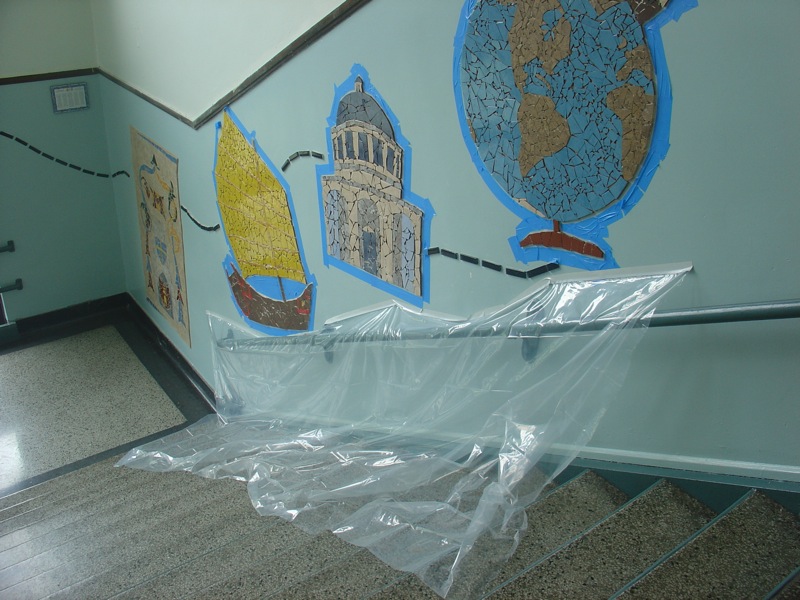
I choose to grout alone as it is too tricky to try to manage students at the same time- it is messy, requires a fair amount of skill and can cut one’s fingers. I wear latex gloves but they offer little protection.

In fact, now that I think of it, this is the first mosaic I have done where I have escaped without sliced fingertips!  Yay!   I must be getting better at this!

After using sponges to  apply the grout using a kind of sweeping ‘S’ shaped movement to bring the grout into the cracks from various angles, I go back to the earliest piece that I grouted and hope that it has reached the “dusty” stage of dryness.
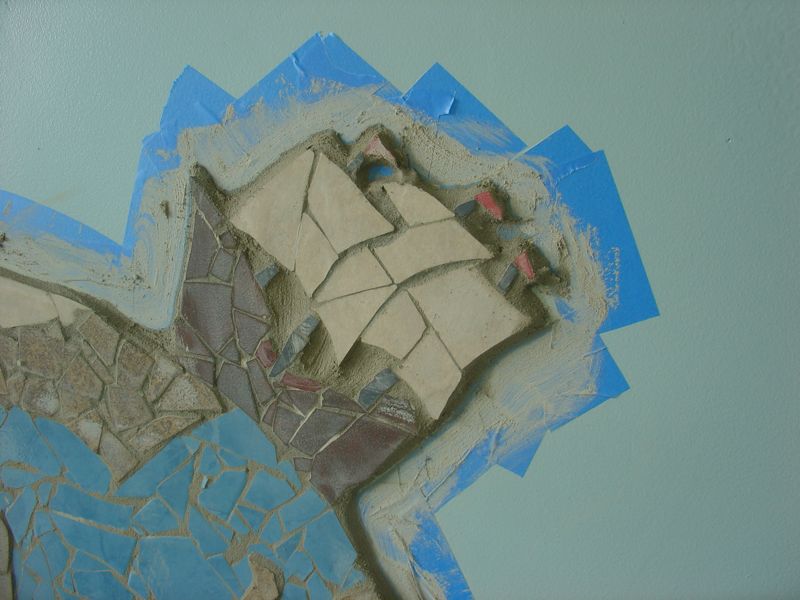
Lastly, I clean them off vigorously with paper “rags” and then remove the tape before the grout hardens completely. If I didn’t, the tape would actually get trapped under the hardened grout (it’s cement actually).

and VOILA!! The finished Time Line.